
Welcome to Kindergarten!
I knew exactly how I wanted my room set up when I was in third grade, but this year I had to work extra hard on organizing and setting up a new room for a new grade level. Here is a complete tour of my classroom!


 My wonderful husband helped me with this long bulletin board. He was definitely a trooper! Every student has their own cubby which contains their book box, writing notebook, and their wallet.
 Why do they have a wallet? Well in my classroom the students are rewarded with classroom dollars. These can be used to purchase items from our classroom prize box. If the students do their job throughout the day then during dismissal I give them their dollar. It is definitely a huge hit no matter what grade you teach. I have done it in third and kindergarten.
 This part of our classroom is where I display the students writing. I used clear protective sleeves and put the students names at the top. When I have something new to hang up, I slip their work out of the clear sleeve and put a new paper in. This saves me a lot of time and is super easy.
 Every day the kiddos participate in centers. I needed an easy way to organize and move the kids around. Every piece has Velcro so that it can easily be moved. When we rotate through, I take the white card off the bottom of the list, move every card down one, then put the card from the bottom on the top.
 This is our classroom data wall. I update it frequently because the students are always growing! I have graphs that display data for the whole class. I also have stars that I write the students names on when they are able to accomplish that goal.
 This is my listening center. Every week I add 5 new books and CDs to the center. I purchased all of my books on CD from Scholastic.
 These are our Poetry Books and Writing Folders. I have them organized by what table the students sit at. This makes it very simple to pass out. All I have to do is put the basket on their table and they get their supplies themselves. I am all about making things simpler for me. Every week we have a new poem that we read as a class, then they add the poem to their poetry book. Their writing folders have resources that help them when they are writing sentences. We are just starting to really use them.


Every time we leave the classroom we mark where we are going on our classroom sign. Usually I have one of my teaching assistants change the star.

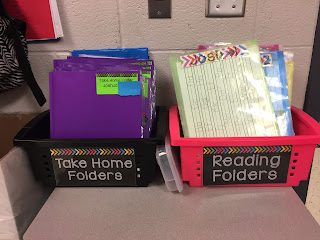
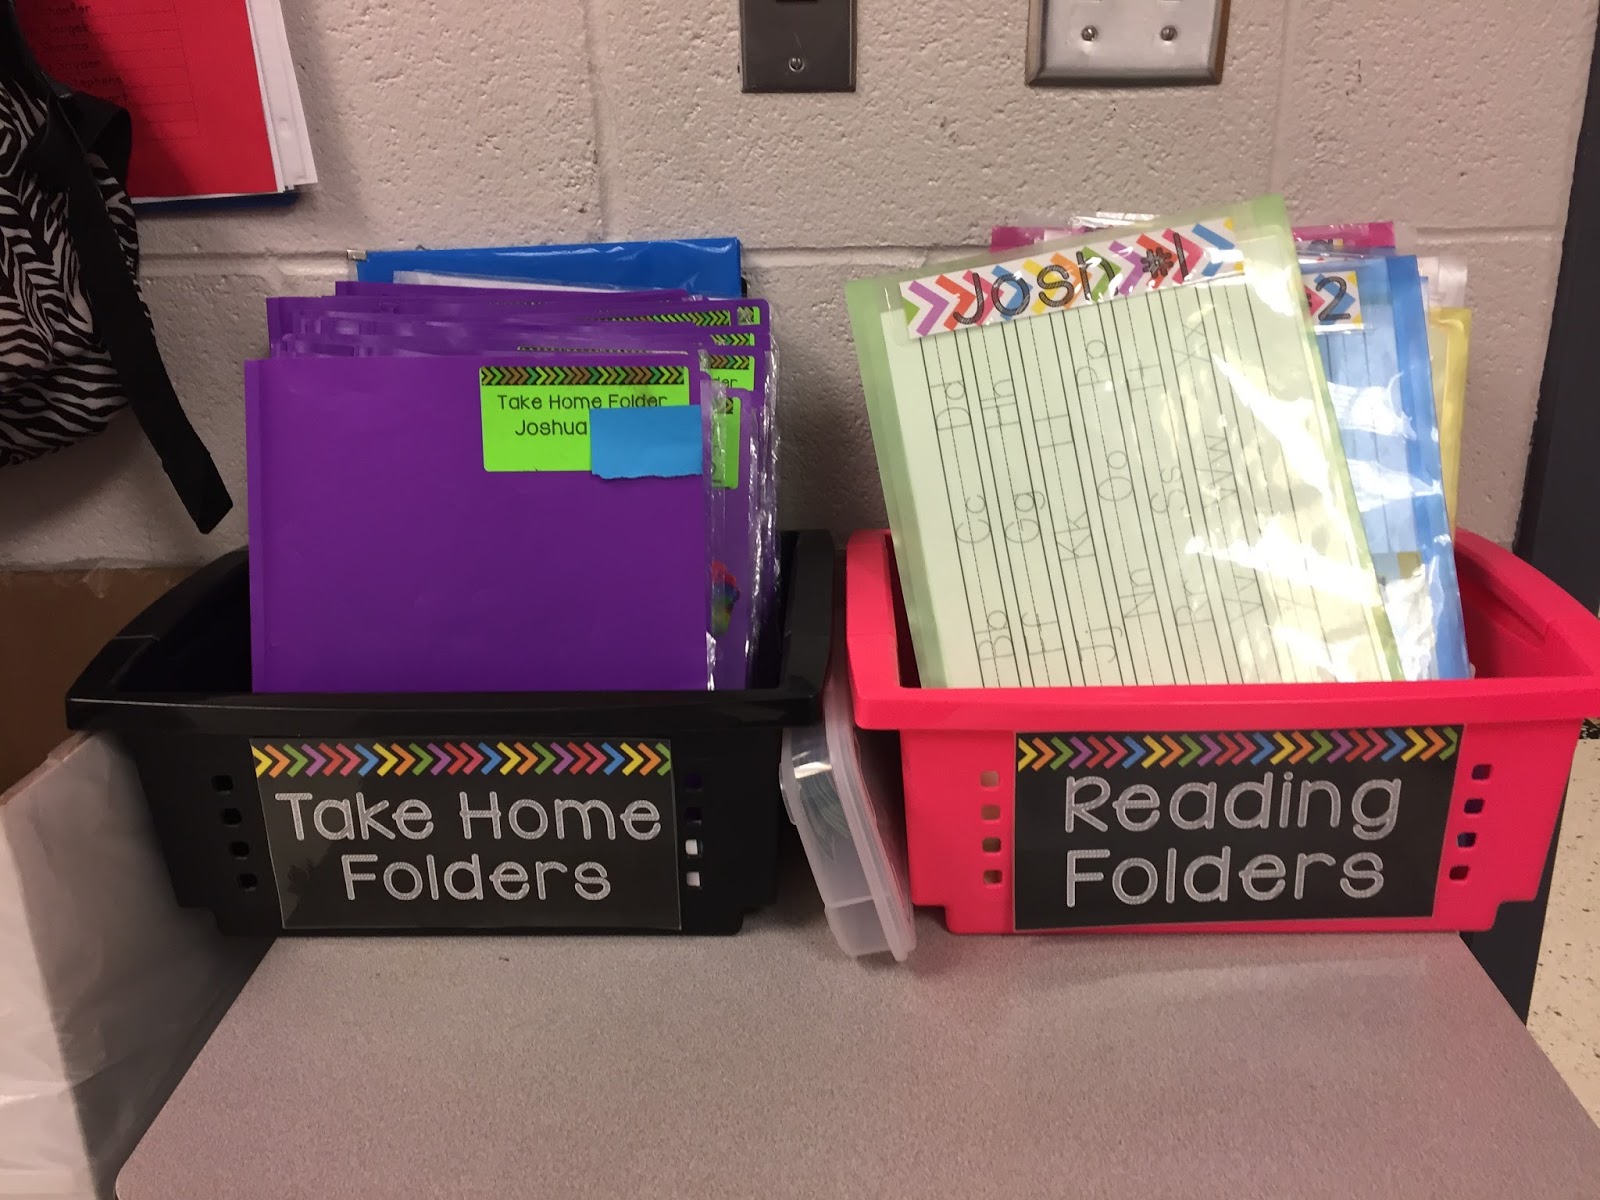
Every morning when the kiddos come into the classroom they are responsible for doing two tasks. Task one is to pick their lunch, and task two is to put their folders into the correct bins. They have two take home folders. One is meant for communication and the other is a reading take home folder. This folder contains reading group books, sight word books, and a dry erase mat.

During calendar time, this is where we focus most of our attention. The side of the board is lined with the songs that we sing during calendar. I have these posted so that if I have a substitute they know exactly what to do and what songs we sing.


This is my teaching storage. My day goes smoothly if I am organized. The baskets hold copies and supplies. Many times I make copies in advance and I need somewhere to put them. I make the copies, then throw them in the basket. When I am ready for it, I know where to easily find everything I need. The binders hold a class project the students and I are working on. I will share a post about those at a later time.

The bottom cabinet is my favorite. I have all of my supplies organized and labeled so I can easily find everything I need.

This is my Bookshelf that houses all of our centers, pillows, and many inside recess activities. It is not always organized, but as long as everything is on the shelf I am usually happy.

Here is my Word Wall. I add new words to it every week when we learn a new sight word.

When I taught third grade my library was the focus of my room. I do not have as many books yet for kindergarten, but I am working on expanding. My library is organized by a number system. Every book has a number on it and the number matches the number on the bin that it belongs in. It took about a week of training, but my kindergarteners take pride in making sure the library stays organized. It is a very simple system that they are able to keep up with.

I have not had a desk in my classroom since my first year of teaching. I decided I did not need it and it was a waste of space. This is my teacher area of the room. All of my teaching supplies are organized in this area. I am trying out the dry erase circles this year on my guided reading table. So far they are a hit! The kiddos LOVE them!

My black desktop organizer is my weekly organizer. Each shelf is for a day of the week. As I prepare activities I put them on the shelf for the day we are going to complete that activity. It is really nice to have everything ready in advance. If you need a sub everything is ready to go.

The rainbow storage bin is my guided reading organizer! Everything I need for guided reading groups is right there. Each group has a bin dedicated to them. I have their names on Velcro so I can easily move them around as needed. I always have 3 reading groups a day and without this organizer I am not sure how I would keep everything organized and readily available.


