Wednesday, July 12, 2017

Organizing Your Erin Condren Teacher Planner

I am obsessed with my Erin Condren Teacher Planner! It keeps me organized and efficient. 

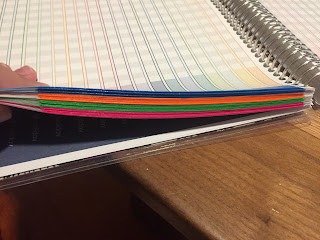
I am very into color coding everything, so that is exactly what I did with my planner. I bought Rainbow Neon Washi Tape from Amazon. It is so bright, I can't wait to order more! 

I started in the Calendar part of the planner and every day that is in quarter 1 has blue Washi tape on it, quarter 2 is orange, quarter 3 is green, and quarter 4 is pink. These colors are consistent throughout the whole planner. 

After the calendar section I moved to the lesson plan section. Every page has the colored Washi tape to the right of the page. That Washi tape represents the quarter that we are currently in. 


The last section that I color coded is the data sheets. I designated 7 pages for each quarter. I put the tape at the top of the page. 


Throughout my planner I have 1 inch round sticker labels. These labels I purchased on Amazon and they are removable! I love them! They are by Avery. 


As I continue to organize my teaching planner, I will take pictures and update my post! 

Happy Planning Everyone! 

Monday, June 12, 2017

End of Year Student Gifts

It is so hard to believe the end of the year is already here! I had to think about what I wanted to make my kiddos and I decided to make them each their own beach bucket customized with their names. Then I am filling the bucket with a few things. 
What's in a bucket?! 


Here is a look inside their buckets! 

The beach balls have been signed by all of their classmates. 

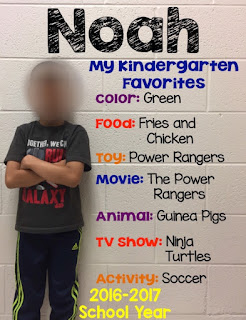
Their Kindergarten Favorites picture. 
(There is a blog post on how to make a Kindergarten Favorites picture. )

Their September vs June Pictures

A poem

Custom Made Stationary for each kiddo


Custom made Sunglasses 


A book from Scholastic 

And finally, a class picture! 

I am so excited to give these to the kiddos! The buckets and sunglasses were made using my Cricut machine. 

The buckets were purchased and they had this awful sticker on the front. It would not come off nicely. I had to soak the bucket under warm water and use a scrub brush to get the stickers off, then there was a sticky residue. I used Goo Gone to get the stickiness off, then the Goo Gone left a residue so I hand washed every bucket. 
It was a long process, but afterwards I had 22 clean, stickerless, buckets ready to go! 


Monday, May 15, 2017

Awesome Parent Volunteer Gifts

My parent volunteer gifts are all done and ready to go for the end of the year. If you are looking for a simple, but awesome gift this one is for you! I got the idea from Primarily Speaking. I did this last year and it went over well! 

How was it made?
Step 1: Purchase all of your supplies. 
You will need: clear bags, baskets, ice cream cups, and your choice of Toppings. I bought the baskets and ice cream cups at Target. The clear bags are from Michaels. 

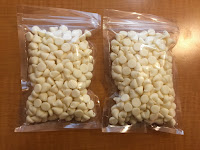
For Toppings I chose to include chocolate sauce, caramel sauce, white chocolate chips, milk chocolate chips, heath bar bites, m&ms, rainbow sprinkles and crushed Oreos. 
Step 2: Put the toppings into the clear baggies. I made two baskets because I have two wonderful parent volunteers. 


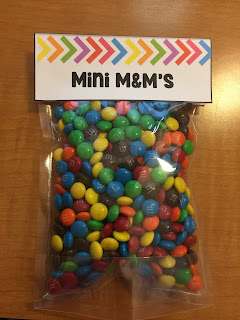
Step 3: I made labels for each bag so the parents would know what was in the bags. I designed them in Powerpoint. 
Step 4:Cut out the labels and fold on the line

Step 5: I used Glue Dot Lines to put on the labels and then I folded them over the baggies. 
Step 6: You will need to print the Cards! They are free to print. (Click Cards)

Step 7:Put it all together and you have an amazing volunteer gift! 

Sunday, May 14, 2017

My Kindergarten Favorites Pictures

As part of their end of year gift I decided to make these cute My Kindergarten Favorites Pictures. They look like they were difficult to make but they were really easy! Here is how to make them step by step! 

Step 1: You will need to take all of your kiddos pictures up against a plain wall. I used a wall in my classroom. When you take the picture you need to leave room on the top and on the right hand side. This is for the words and their name. I did not give my students a pose. I told them they could pose however they wanted. 
Step 2: I asked the kiddos some questions about themselves. 
What is your favorite color?
What is your favorite food?
What is your favorite toy?
What is your favorite movie?
What is your favorite animal?
What is your favorite TV show?
What is your favorite activity?
Step 3: You will need to design your pictures in powerpoint. I first went through and made the kiddos pictures the backgrounds of the slides. 
Step 4: I added all of the students names at the top. Create a text box and pick a fun font. 
Step 5: Create a separate text box to say, "My Kindergarten Favorites." 
Step 6:Create a separate text box to put all of the answers to their questions. 
Step 7: Create a final text box for your school year. 
Step 8: You are all done and ready to print! Repeat for each student! 

Here are all of the finished products! I love them!